Teacher's Guide
You can use these buttons to move to the next or previous webpage.
You can use these buttons to move to the next or previous page.
- What Teachers Should Know
- Key Concepts
- About "Adventures of the Lead Busters Club"
- Suggestions for Using Activities in this Book
- Additional Resources
- Cooking and Recipes
- Supplementary Activities -- Music
- Letter to Parents/Guardians
- Symptoms of Lead Poisoning
What Teachers Should Know About Lead Poisoning
Lead poisoning is a serious but preventable health problem. Lead can cause permanent damage to children -- especially unborn babies and children under six years old, who are generally more sensitive to lead's damaging effects than adults. Lead affects virtually every system in the body. It is particularly harmful to the developing brain and nervous system of young children.
While no amount of lead in the body is safe, the effects of lead depend upon the level of lead in the blood. In children, very high levels can cause deafness, blindness, coma, convulsions, and even death. Moderate levels, too, can harm the brain and nervous system, kidneys, and liver. Even very low levels, which do not cause any obvious symptoms, are associated with decreased intelligence, behavioral problems, decreased growth, impaired hearing, and decreased ability to maintain a steady posture.
Moreover, these problems remain long after childhood. In comparison with children who have not been exposed to lead, children who have been exposed are much more likely to have reading difficulties, poor vocabulary, attention problems, poor fine-motor coordination, greater school absenteeism, and lower class ranking. They are more likely to drop out of high school.
Symptoms of Lead Poisoning in Elementary School Children
Children with lead poisoning may not look or act sick. Even if children do show some signs of lead poisoning, these symptoms can often be mistaken for other illnesses, such as the flu.
Early symptoms may include tiredness or restlessness, headache, stomachache, constipation, irritability, and poor appetite. As more lead accumulates, children may become clumsy and weak, and they may lose skills that they have already learned. More severe symptoms may include vomiting, loss of sight or hearing, and lapses in consciousness (that is, going in and out of consciousness).
Children with lead poisoning may:
- Fail to finish class assignments
- Disrupt their classes
- Perform poorly in school
- Be unable to tolerate frustration
- Have problems learning
- Be easily distracted
- Need a lot of supervision
- Have problems with other children
- Frequently call out in class
- Have difficulty staying seated
- Have difficulty concentrating
Children who are NOT lead poisoned may show some of these symptoms from time to time, although usually to a much milder degree. Moreover, many of the symptoms of lead poisoning may also indicate other health conditions or learning and behavior problems. However, if lead poisoning is suspected, the child should be referred to a medical professional for testing.
About Adventures of the Lead Busters Club
This book has been written for second grade students. Its goals are to teach them:
- The dangers of lead poisoning
- How to recognize potential lead dangers in their neighborhood
- What they can do to protect themselves from these dangers
This book contains a variety of activities, including reading, writing, discussion (small group or whole class), a board game, drawing, a word search, and a quiz. It is designed to be used by classroom teachers in conjunction with other aspects of the curriculum, such as language arts and science activities. Supplementary material is provided to teachers for related music, cooking, and exercise activities.
Each teacher knows his/her class best and will make appropriate decisions concerning use of this book. Below are some suggestions to consider.
We recommend that teachers not go through the entire book in one session. The book was designed so that the teacher can do two or three pages at a sitting, depending on the time available, the fit with other curricular needs, and class interest and attention.
Although students should have a break (a few hours or even a few days) between the sections, we suggest that the activities be done in the sequence in which they appear. Built-in repetition should serve to review and reinforce the key concepts.
Key Concepts
General
- Lead is a poisonous substance.
- If lead gets into children's bodies, it can make them sick.
Sources of Lead
- Lead is found in many neighborhoods (especially on buildings constructed before 1978).
- Major sources of lead are flakes and dust from old, lead-based paint.
- Lead-based paint is particularly common on old windows, doors, stairs, railings, and porches.
- Lead dust is common where workers are fixing old houses.
- Lead dust and flakes may be in the soil around old houses.
Safety Measures That Children Can Take
- Children should never touch paint dust or flakes.
- Children should ask adults to wash away paint flakes and dust with a damp, soapy rag (which should be discarded after use). We do not recommend that the children themselves do this cleanup.
- Children should wash their hands before they eat and after they play.
- Children should leave their shoes at the door and wear socks or slippers in the house.
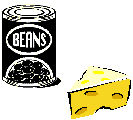
- Children should eat healthy foods, like lowfat milk and yogurt, fruits vegetables, beans, and lowfat meats (foods low in fat and high in calcium, iron, and zinc are especially helpful).
Additional Resources
Additional information on lead poisoning is available on the Internet from the U.S. Environmental Protection Agency, the U.S. Department of Housing and Urban Development, the Alliance to End Childhood Lead Poisoning, the National Institute of Environmental Health Sciences, and many other agencies and organizations.
Suggestions for Using Activities in This Book
Lead in the Neighborhood
Teachers may choose to read the story to the whole class or to small groups. If children's reading levels are appropriate, they might read the story themselves. The illustrations are designed to serve as visual cues for children who cannot readily read all the words.
We recommend that all three parts of this story—identifying lead as a hazard, explaining where lead might be found, and describing actions that children can take to protect themselves—be covered in one session. We want to ensure that children end with the message that they can help ensure their own safety.
Sherman and the Lead Busters Club Look for Lead
The story introduces a "find the hidden dangers" picture. Children can do this search activity individually or in small groups or teams. "Let's Talk About It" can be done as a whole class or in small groups, with the teacher monitoring the discussions to be sure the children have understood the messages from the first story. "Let's Think About It" can be an in-class assignment or homework.
Agatha Fights Lead
This story could be a read-aloud exercise for the whole class or small groups. Alternatively, if only a few children in the class are able to read this material very well, they might be assigned the roles of the story characters and be asked to present/read this story as an impromptu play. "Let's Think About It" can be an in-class assignment or homework.
The Lead Busters' Clubhouse
The teacher will need to provide coins (pennies or nickels) for tossing and buttons for playing pieces, as well as crayons, colored pencils, pens, or markers for coloring the clubhouse at the end of the game.
The board game might also be repeated a week or so after the book is completed, to remind students of the key messages. (Teachers might make photocopies of the game for later use if students take the rest of the book home.)
Elisa Saves the Day!
The focus here is on teaching children how they can help their younger brothers, sisters, cousins, or neighbors to be safe.
To supplement this activity, the teacher might want to bring in some props to demonstrate how to clean up paint dust: baby powder, flour, or cornstarch to simulate paint dust, a rag, some water, and a bottle of dish detergent. The teacher could remind the children never to touch the paint dust themselves. He/she could then demonstrate what the adult should do: wet a rag, apply some dish detergent, clean up the "dust," and then throw the rag away.
Word Search
This could be an in-class assignment or homework.
Henry and His Worries
Although the children need to be cautious about lead, it is important that they not be unduly fearful. "Lead pencils" actually contain graphite, not lead, and paints that have a certification seal are safe to use.
"Let's Write About It" can be an in-class assignment or homework. The teacher needs to be prepared to answer these questions. If the teacher needs help in answering some of the questions that the children raise, he/she can consult the internet resources listed above or the authors liked in the Credits.
If the children are not able to do this task as a writing assignment, it could become a discussion instead. Join the Lead Busters Club Now!
The teacher might make a real ceremony of this activity. The children can take the pledge as a class or individually. Any children who do not wish to take the pledge should not be forced to do so or penalized in any way.
As part of the ceremony, all of the students can be given their own copies of the certificate of completion (included below). You may wish to photocopy the certificate with a color printer or onto colored paper.
Healthy Food Quiz
This quiz is not intended to be graded. Students can complete it individually or all together as a class. Alternatively, students could be divided into teams, with a competition for the group that comes up with the most correct answers.
Make a Lead Busters Poster
Teachers will need to provide pencils, pens, crayons, markers, or paint. Teachers can select the best posters to put up in an appropriate display area. All other posters could be considered "runners up" and acknowledged. The contest could include several classes if the teachers wish.
Supplementary Activities
Music and Movement — Song "Get the Lead Out Rap"
This song describes how children should wash their hands to prevent lead from getting into their bodies and making them sick.
Key Concepts of Hand Washing
- Washing hands is a good way for children to stop lead from getting into their bodies and making them sick.
- Children need to follow five steps when washing their hands:
- Wet hands with warm water.
- Apply soap.
- Rub hands together.
- Clean between fingers.
- Rinse well.
- Children must wash their hands with soap and water for twenty seconds to make sure that all of the dirt and lead are gone. (The following hand-washing song takes about twenty seconds to sing.)
- Children should wash their hands before they eat and after they play.
Materials Needed
- Photocopies of the "Get the Lead Out Rap" (one copy per child, if possible).
Preparation Needed
- Make up or adapt any rap tune that will fit the words of the "Get the Lead Out Rap."
- Practice singing the song until you feel comfortable teaching it to the children.
Introduction
- Remind the children that washing their hands is a good way to keep lead out of their bodies.
- Tell the children that there are five steps to washing their hands:
- Wet hands with warm water.
- Apply soap.
- Rub hands together.
- Clean between fingers.
- Rinse well.
- Tell the children that they are going to learn a special song that will help them remember to wash their hands well. The name of the song is the "Get the Lead Out Rap."
Procedure
- Distribute photocopies of the song.
- Sing the "Get the Lead Out Rap" once through, using hand motions to illustrate the message of the song.
- When the children are ready to learn the song, sing the first line and and have them repeat it. When they have mastered the first line, continue with the next. Repeat each line as many times as necessary until all or most of the children seem to know it.
- When the children have learned all the verses of the song, they can act it out.
Review Questions
Ask the children the following questions:
- Why do you need to wash your hands? [Answer: To remove dirt and lead.]
- How many steps does it take to clean your hands well? [Answer: Five.]
- What are the steps? [Answer: Wet hands, apply soap, rub hands together, clean between fingers, and rinse well.]
- How long should you wash your hands? [Answer: Twenty seconds, or as long as it takes to sing the "Get the Lead Out Rap."]
- When should you wash your hands if you want to keep lead out of your body? [Answer: Before eating and after playing.]
Cooking and Recipes
The following are recipes for snacks that provide calcium, iron, or zinc, elements that may help to protect children from the effects of lead.
Have children do as much of the work on their own as possible, with careful supervision. Offer help as necessary.
Key Concepts
- Some foods, such as milk, cheese, yogurt, peanut butter, and dried fruit are rich in calcium, iron, and zinc.
- Some foods, such as beans, tofu, and canned fish, are rich in iron and zinc.
- Eating foods rich in calcium, iron, and zinc may keep lead from staying in children's bodies and making them sick.
Preparation Needed
- Read the recipe to familiarize yourself with the steps for preparation.
- Adjust quantities depending on the number of children in the class.
- Assemble all the ingredients and place them on a tray in the order you will use them.
- Assemble all the cooking utensils and place them on another tray.
- Have two children wash and dry the table to be used in this activity.
- Have children wash their hands in preparation for the cooking activity.
- Remind them about the hand washing rule (wash your hands with soap and water before you eat and after you play) and have them sing the "Get the Lead Out Rap."
- If you wish to have the children read the recipe, make photocopies of the following pages. Children can also take these recipes home to share with their families.
Introduction
- Remind children that eating healthy foods can help protect them from the effects of lead poisoning.
- Tell children that calcium, iron, and zinc help to keep lead from staying in their bodies.
- Tell children that they are going to make snacks that have lots of calcium, iron, or zinc.
- Explain that everyone will have a turn adding and mixing ingredients.
- Explain that the snacks they make will be served during their snack or lunch time.
Procedure
- Read or have the children read the first step in the directions.
- After reading that step, check that the children understand by asking some questions, such as "What utensils do we need to get?" and "What ingredients do we need to measure?"
- Complete the first step and then continue with the recipe.
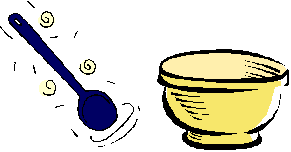
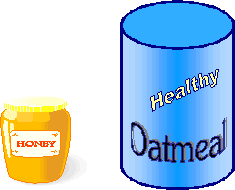
Oatmeal Rounds
Snacks that provide
calcium, iron, and zinc
Yield: 36 rounds
Materials
- Two sets of measuring cups (one for dry ingredients and one for wet ingredients)
- One large mixing bowl and one small mixing bowl
- Wax paper
- Teaspoons (one for each child)
- Mixing spoons
- Two trays
- Cookie sheet
- Ingredients: peanut butter, honey, oatmeal, nonfat dry milk, raisins or other dried fruit, and wheat germ
Ingredients
1 cup oatmeal (quick cooking or instant)
2 cup honey
2 cup nonfat dry milk (instant)
1 cup peanut butter
1 cup raisins or other chopped dried fruit
1 cup wheat germ
Method
- Scoop oatmeal out of its box into a 1-cup measuring cup. Pour oatmeal into the large mixing bowl.
- Pour nonfat dry milk (instant) from the box into a 2-cup measuring cup. Pour dry milk into the large mixing bowl.
- Scoop raisins or other dried fruit from its box into a 1-cup measuring cup. Pour fruit into the large mixing bowl.
- Use a large mixing spoon to stir all of these dry ingredients together until well mixed.
- Pour honey out of the jar into a 2-cup measuring cup. Pour honey into the large mixing bowl.
- Scoop out peanut butter from the jar into a 1-cup measuring cup. Scrape peanut butter into the large mixing bowl.
- Use a large mixing spoon to stir all of the ingredients together. Mix until all of the ingredients have combined and blended.
- Have each child cut out a 12-inch square of wax paper. Have each child scoop out some of the mixture with a teaspoon and place it on the wax paper.
- Have each child shape the mixture into a 1-inch ball using his/her spoon.
- Pour wheat germ into 1-cup measuring cup. Pour wheat germ into the small bowl. Have each child drop his/her ball into the bowl of wheat germ and roll it around with his/her spoon until the ball is coated.
- Line a cookie sheet with wax paper. Then have the children transfer the ball to the tray lined with wax paper. Cover the cookie sheet with additional wax paper and refrigerate until the snack is served.
Recipe adapted from Supersnacks, a publication of the Connecticut Cooperative Extension System.

Mexican Bean Wheels
Snacks that provide iron and zinc
Yield : 12 wheels
Material4
- Medium-size mixing bowl
- Two sets of measuring spoons (one for dry ingredients and one for wet ingredients)
- Measuring cups
- Mixing spoons
- Two trays
- Toothpicks
- Sturdy plastic knives for cutting up vegetables and spreading bean paste
- Sturdy metal forks for mashing beans
- Ingredients: flour tortillas, lowfat mayonnaise or plain yogurt, vinegar, chili powder, garlic powder, cooked kidney or pinto beans, celery, onion or green pepper; optional: lettuce leaves, cheese, or green pepper strips
Ingredients
3/4 cup cooked kidney or pinto beans
3 tablespoons chopped celery
1 tablespoon chopped onion or green pepper
2 teaspoons lowfat mayonnaise or plain yogurt
2 flour tortillas
1 teaspoon vinegar
1/4 teaspoon chili powder
1/8 teaspoon garlic powder
Optional: tomatoes, lettuce, sliced cheese, green pepper strips
Method
- Scoop out cooked kidney or pinto beans into a 1-cup measuring cup. Fill the cup ¾ full. Pour the beans into the mixing bowl.
- Mash the beans using metal forks.
- Add 3 tablespoons of chopped celery to the beans. Note: Children may be able to chop celery with adult supervision.
- Add 1 tablespoon of chopped onion or green pepper. Note: Children may be able to cut up onion or green pepper with adult supervision.
- Stir all these ingredients together.
- Measure 2 teaspoons of lowfat mayonnaise or plain yogurt and add to the bean mixture.
- Measure 1 teaspoon of vinegar to the bowl.
- Measure ¼ teaspoon of chili powder and 1/8 teaspoon of garlic powder and add to the bowl.
- Stir all the ingredients together. Mix well.
- Place half of the bean mixture on one edge of a tortilla and spread until the whole tortilla is covered with the bean mixture. Roll the tortilla over until it reaches the opposite edge. Insert six toothpicks through the rolled tortilla so it cannot unroll. Cut the tortilla roll into six wheels. Cover with plastic wrap or wax paper and refrigerate until the snack is served.
Optional: The Mexican bean wheels can be served on pieces of lettuce with tomato wedges, cheese slices, or leftover green pepper cut in strips.
Recipe adapted from Making Bag Lunches, Snacks and Desserts Using the Dietary Guidelines (USDA/HNISA H&G Bulletin No. 232-9).
Letter to Parents or Guardians
Teachers may wish to send home a letter to parents or guardians to explain what students have been studying and to tell parents or guardians where they might find additional information. See the sample letter.
Adventures of the Lead Busters Club Credits

Back to "The Lead Busters Club"
You can use these buttons to move to the next or previous page.
You can use these buttons to move to the next or previous webpage.